Art IV
Art IV is an advanced art course for highly motivated students that have successfully completed Art III. Art IV is an intense and focused investigation of art criticism, art history, and the production of art. Students will complete their portfolios that will be utilized for scholarship and/or college application. In addition, students will create artist statements that reflect their personal philosophy of art.
Instructions for Written Statements for Art IV
Your written statement for Art IV is different from the other previous art classes. Your written statements will be written reflections that will later help you create an artist statement at the end of the semester. For all of your 30 point and 25 point projects you will complete a written reflection. Your written statement will be a reflection on the following:
- How you used the elements and principles to communicate your ideas.
- How you explored and experimented with processes and techniques with the media to build up your technical skills.
- Your concepts, theories, inspirations, and/or position for creating your project.
- Your common characteristics or connections between the project and your portfolio.
First Semester
Project: Portfolio Drawing (25 pts)
Christo and Jeanne-Claude are husband and wife team that collaborate to create public installations. Many of their famous installations pieces consist of wrapping large public objects (i.e. buildings and bridges) with fabric. Their installations take decades from conception to installation. Their process begins with drawings of the wrapped objects. They use the drawings as blueprints to acquire permission to construct the installation. After permission is granted, the drawings are sold to aid in funding the installation. Christo and Jeanne-Claude claim that their wrapped installations are purely created for aesthetic reasons.
Many artists practice simulating value by studying the folds of fabric. You will begin your drawing project with a warm up exercise. You will wrap an object with a white sheet. Next, you will wrap the object and sheet with rope; this will create folds in the fabric. You will then draw the wrapped object by paying close attention to the value changes in the folds of the fabric. Your goal is to have extreme contrast in the light and dark areas. You should include mid-tones where they apply. After you have successfully completed the warm up exercise, you begin drawing of your choice that is aligned with your portfolio goals. Remember to use the elements (color, illusion of form, line/ implied lines, shape/ implied shapes, space, texture, and value) and the principles (balance/composition, contrast, emphasis, movement, pattern, rhythm, and unity) to expressive the ideas or concepts of your drawing. Your drawing must have a minimum of ten values. Remember to push your use of value to create a contrast.
When you have completed your artwork, you will reflect by creating a written statement.
Before turning in your project for grading, you will apply formal critique steps to reflect on your artwork. You make the necessary changes to improve your artwork.
Want to learn more about realistic drawing techniques? Check out the following books:
Barber, Barrington. Drawing Masterclass. Cincinnati, Ohio: Metro Books, 2012.
Hillberry, J.D. Drawing Realistic Textures in Pencil. Cincinnati, Ohio: North Light Books. 1999.
Parks, Carrie Stuart and Rick Parks. The Big Book of Realistic Drawing Secrets. Cincinnati, Ohio: North Light Books, 2009.
Learning Objectives and Evaluation Standards
Due Date: 9/12/2019
Many artists practice simulating value by studying the folds of fabric. You will begin your drawing project with a warm up exercise. You will wrap an object with a white sheet. Next, you will wrap the object and sheet with rope; this will create folds in the fabric. You will then draw the wrapped object by paying close attention to the value changes in the folds of the fabric. Your goal is to have extreme contrast in the light and dark areas. You should include mid-tones where they apply. After you have successfully completed the warm up exercise, you begin drawing of your choice that is aligned with your portfolio goals. Remember to use the elements (color, illusion of form, line/ implied lines, shape/ implied shapes, space, texture, and value) and the principles (balance/composition, contrast, emphasis, movement, pattern, rhythm, and unity) to expressive the ideas or concepts of your drawing. Your drawing must have a minimum of ten values. Remember to push your use of value to create a contrast.
When you have completed your artwork, you will reflect by creating a written statement.
Before turning in your project for grading, you will apply formal critique steps to reflect on your artwork. You make the necessary changes to improve your artwork.
Want to learn more about realistic drawing techniques? Check out the following books:
Barber, Barrington. Drawing Masterclass. Cincinnati, Ohio: Metro Books, 2012.
Hillberry, J.D. Drawing Realistic Textures in Pencil. Cincinnati, Ohio: North Light Books. 1999.
Parks, Carrie Stuart and Rick Parks. The Big Book of Realistic Drawing Secrets. Cincinnati, Ohio: North Light Books, 2009.
Learning Objectives and Evaluation Standards
- You should be able to employ the use of elements and principles to communicate your ideas.
- You should be able to explore and experiment with the processes, media, and techniques, analyze, and reflect on your choices to effectively communicate your ideas.
- You should be able to apply processes, media, and techniques with sensitivity to craftsmanship.
- You should be able to demonstrate high level of technical skills to communicate your ideas.
- You should be able to analyze common characteristics and/or connections between project and body of work.
- You should be able to complete by due date.
Due Date: 9/12/2019
Project: Value Painting (30 pts)
You are welcomed to pick between the following painting projects:
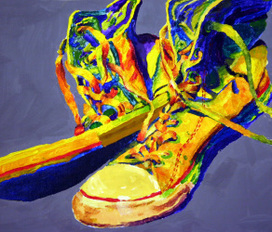
Warm and Cool Colors for Value
You will begin by picking an image you would enjoy painting. (It can be a conceptual piece, but you will need to work from an image. When you have completed the painting, you will turn the image with your painting for evaluation.) You will begin by preparing your canvas. You will need a staple gun, staples, scissors, gesso, canvas, two 12” sketcher bars, two 14” sketcher bars, and a large paintbrush or priming palette knife. See handout and watch demo to prepare your canvas. You will begin your painting by working from your image. You will change the color scheme by using warm colors (yellows, oranges, and reds) for the highlights and cool colors (greens, blues, and violets) for the shadows. For example, your lightest value will be a tint of a yellow and your darkest value will be a shade of violet. Remember to create a darker color, you will add the color’s complementary color. Remember to use the elements (color, illusion of form, line/ implied lines, shape/ implied shapes, space, texture, and value) and the principles (balance/composition, contrast, emphasis, movement, pattern, rhythm, and unity) to expressive the ideas or concepts of your drawing. Remember to create a darker color, you will add the color’s complementary color. When you have completed the project, turn in your image with your project for grading.
You will begin by picking an image you would enjoy painting. (It can be a conceptual piece, but you will need to work from an image. When you have completed the painting, you will turn the image with your painting for evaluation.) You will begin by preparing your canvas. You will need a staple gun, staples, scissors, gesso, canvas, two 12” sketcher bars, two 14” sketcher bars, and a large paintbrush or priming palette knife. See handout and watch demo to prepare your canvas. You will begin your painting by working from your image. You will change the color scheme by using warm colors (yellows, oranges, and reds) for the highlights and cool colors (greens, blues, and violets) for the shadows. For example, your lightest value will be a tint of a yellow and your darkest value will be a shade of violet. Remember to create a darker color, you will add the color’s complementary color. Remember to use the elements (color, illusion of form, line/ implied lines, shape/ implied shapes, space, texture, and value) and the principles (balance/composition, contrast, emphasis, movement, pattern, rhythm, and unity) to expressive the ideas or concepts of your drawing. Remember to create a darker color, you will add the color’s complementary color. When you have completed the project, turn in your image with your project for grading.

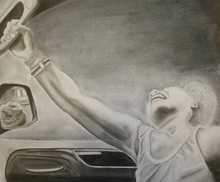
All Values with a Pop of Color
You will begin by picking an image you would enjoy painting. (It can be a conceptual piece, but you will need to work from an image. When you have completed the painting, you will turn the image with your painting for evaluation.) You will begin by preparing your canvas. You will need a staple gun, staples, scissors, gesso, canvas, two 12” sketcher bars, two 14” sketcher bars, and a large paintbrush or priming palette knife. See handout and watch demo to prepare your canvas. You will begin your painting by working from your image. You will change the color scheme by only using whites, grays, and blacks. For example, for your lightest value, you will use a pure white. For your darkest area, you will use a pure black. Next, you will pick one object from your image and paint it with a pop of color (i.e. red.) Use the pop of color to express or communicate your ideas or concept for creating the piece. Use the elements (color, illusion of form, line/ implied lines, shape/ implied shapes, space, texture, and value) and the principles (balance/composition, contrast, emphasis, movement, pattern, rhythm, and unity) to expressive the ideas or concepts of your painting. Remember to create a darker color, you will add the color’s complementary color. When you have completed the project, turn in your image with your project for grading.
When you have completed your artwork, you will reflect by creating a written statement.
Before turning in your project for grading, you will apply formal critique steps to reflect on your artwork. You make the necessary changes to improve your artwork.
Want to learn more about mixing paints and painting techniques in acrylic paint? Check out the following books:
Mirza, Jill and Nick Harris. Mix Your Own Acrylics. New Jersey: Chartwell Books, 1995.
Reyner, Nancy. Acrylic Innovation. Cincinnati, Ohio: North Light Books, 2010.
Sidaway, Ian. Color Mixing Bible. New York: Watson-Guptill Publications, 2002.
Learning Objectives and Evaluation Standards
Due Date: 10/11/2019
You will begin by picking an image you would enjoy painting. (It can be a conceptual piece, but you will need to work from an image. When you have completed the painting, you will turn the image with your painting for evaluation.) You will begin by preparing your canvas. You will need a staple gun, staples, scissors, gesso, canvas, two 12” sketcher bars, two 14” sketcher bars, and a large paintbrush or priming palette knife. See handout and watch demo to prepare your canvas. You will begin your painting by working from your image. You will change the color scheme by only using whites, grays, and blacks. For example, for your lightest value, you will use a pure white. For your darkest area, you will use a pure black. Next, you will pick one object from your image and paint it with a pop of color (i.e. red.) Use the pop of color to express or communicate your ideas or concept for creating the piece. Use the elements (color, illusion of form, line/ implied lines, shape/ implied shapes, space, texture, and value) and the principles (balance/composition, contrast, emphasis, movement, pattern, rhythm, and unity) to expressive the ideas or concepts of your painting. Remember to create a darker color, you will add the color’s complementary color. When you have completed the project, turn in your image with your project for grading.
When you have completed your artwork, you will reflect by creating a written statement.
Before turning in your project for grading, you will apply formal critique steps to reflect on your artwork. You make the necessary changes to improve your artwork.
Want to learn more about mixing paints and painting techniques in acrylic paint? Check out the following books:
Mirza, Jill and Nick Harris. Mix Your Own Acrylics. New Jersey: Chartwell Books, 1995.
Reyner, Nancy. Acrylic Innovation. Cincinnati, Ohio: North Light Books, 2010.
Sidaway, Ian. Color Mixing Bible. New York: Watson-Guptill Publications, 2002.
Learning Objectives and Evaluation Standards
- You should be able to employ the use of elements and principles to communicate your ideas.
- You should be able to explore and experiment with the processes, media, and techniques, analyze, and reflect on your choices to effectively communicate your ideas.
- You should be able to apply processes, media, and techniques with sensitivity to craftsmanship.
- You should be able to demonstrate high level of technical skills to communicate your ideas.
- You should be able to analyze common characteristics and/or connections between project and body of work.
- You should be able to complete by due date.
Due Date: 10/11/2019
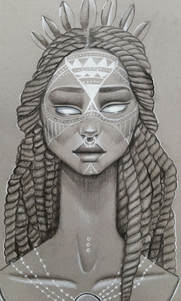
Project: Charcoal Drawing (10 pts)
Charcoal has been used for a drawing tool since prehistoric times (i.e. soot from a fire and charred pieces of wood.) Charcoal comes in many different forms. Charcoal sticks are made from vine or willow twigs that are charred at a high temperature in a kiln. Vine is more expensive, but makes a richer mark. The harder the charcoal, the better it is for detailed, linear work, as it does not smudge as much. One drawback from vine charcoal is that it breaks easily. Compressed charcoal is made from powder ground from charcoal and mixed with a binder and then pressed into short, thick sticks. Compressed charcoal does not break so easily and it produces extreme dark blacks. One drawback is that the charcoal does not dust off as easily as vine charcoal because of the binder. Lastly, charcoal pencils are made from thin sticks of compressed charcoal encased in wood. They are cleaner to handle and easier to control than stick charcoal. Charcoal pencils come in hard, medium and soft. The tips can be sharpened like a pencil.
Charcoal is an excellent medium for drawing. The techniques utilized in pastel drawing can also be applied to your charcoal drawing. Simply by twisting and varying the pressure, you can make fluid lines that vary from soft and tentative to bold and vigorous. Rich tonal effects, ranging from deep blacks to misty grays, are achieved by smudging and blending the charcoal lines with the fingers, tissue, piece of leather, or a blending stump. Highlights can be simulated by leaving the color of the paper and/or layering white charcoal. In addition, you can use a kneadable eraser to remove some of the charcoal. The nature of charcoal makes it messy to handle and you could leave fingerprints on your paper which would fall in the grading category of craftsmanship. So, make sure you have a damp rag handy and wipe your fingers as you work. When you are done with your drawing, you will spray it with a fixative to protect it from smudging.
You will begin by finding an image you would like to reproduce in charcoal. You will practice the following techniques to recreate your image. You will start by using vine or pressed charcoal for the mid-tones in your image. When adding the mid-tones, focus on the application and the direction of the charcoal lines to create the illusion of form. Next, you will add dark values with the pressed charcoal. You can use the color of your paper for some of the mid-tones and highlights. Lastly, you will use white charcoal for white or light highlights. Blend the charcoal where you see the graduated values and make sure where you see crisp, hard lines you do not blend the charcoal.
Before turning in your project for grading, you will apply formal critique steps to reflect on your artwork. You make the necessary changes to improve your artwork.
What do learn more about artist's that use charcoal? Look up charcoal drawings by the following artists:
Leonardo da Vinci, Michelangelo, Peter Paul Rubens, Edgar Degas, and Kathe Kollwitz.
Learning Objectives and Evaluation Standards
Due Date: 10/23/2019
Charcoal is an excellent medium for drawing. The techniques utilized in pastel drawing can also be applied to your charcoal drawing. Simply by twisting and varying the pressure, you can make fluid lines that vary from soft and tentative to bold and vigorous. Rich tonal effects, ranging from deep blacks to misty grays, are achieved by smudging and blending the charcoal lines with the fingers, tissue, piece of leather, or a blending stump. Highlights can be simulated by leaving the color of the paper and/or layering white charcoal. In addition, you can use a kneadable eraser to remove some of the charcoal. The nature of charcoal makes it messy to handle and you could leave fingerprints on your paper which would fall in the grading category of craftsmanship. So, make sure you have a damp rag handy and wipe your fingers as you work. When you are done with your drawing, you will spray it with a fixative to protect it from smudging.
You will begin by finding an image you would like to reproduce in charcoal. You will practice the following techniques to recreate your image. You will start by using vine or pressed charcoal for the mid-tones in your image. When adding the mid-tones, focus on the application and the direction of the charcoal lines to create the illusion of form. Next, you will add dark values with the pressed charcoal. You can use the color of your paper for some of the mid-tones and highlights. Lastly, you will use white charcoal for white or light highlights. Blend the charcoal where you see the graduated values and make sure where you see crisp, hard lines you do not blend the charcoal.
Before turning in your project for grading, you will apply formal critique steps to reflect on your artwork. You make the necessary changes to improve your artwork.
What do learn more about artist's that use charcoal? Look up charcoal drawings by the following artists:
Leonardo da Vinci, Michelangelo, Peter Paul Rubens, Edgar Degas, and Kathe Kollwitz.
Learning Objectives and Evaluation Standards
- You should be able to employ the use of elements and principles to communicate your ideas.
- You should be able to explore and experiment with the processes, media, and techniques, analyze, and reflect on your choices to effectively communicate your ideas.
- You should be able to apply processes, media, and techniques with sensitivity to craftsmanship.
- You should be able to demonstrate high level of technical skills to communicate your ideas.
- You should be able to analyze common characteristics and/or connections between project and body of work.
- You should be able to complete by due date.
Due Date: 10/23/2019
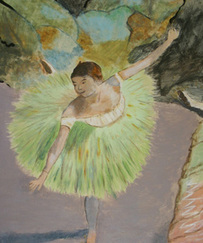
Project: Watercolor Painting (15 pts)
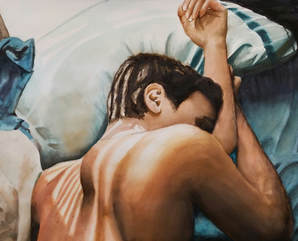
Watercolor has delicacy and transparency that makes it the perfect medium for capturing the subtle nuances of light and color in nature. Because the paint is transparent, the white reflective surface of the paper shines through the colors, and give them their unique luminosity. The fluid nature of watercolor makes it less predictable than other painting media, but this is more than compensated by the range of beautiful effects it can create.
Watercolor consists of very finely ground pigments bound with gum solution. The gum enables paint to be heavily diluted with water to make thin, transparent washes of color, without losing adhesion to the support. When mixing paint, always mix more paint than you think you will need. It is very difficult to remix the same exact color a second time. You cannot tell by looking at the paint on a palette whether you have achieved the rich color or value. The color must be seen on the paper. Watercolor always dries lighter on the paper than it appears wet. Have an extra paper to test colors on before applying them to your painting.
The finish of the paper has a lot to do with how the brush and paint will respond. The finish of the paper can either be Hot Press (HP) or Cold Press (CP.) Hot Press has a smoother texture than Cold Press because it goes through hot rollers like an iron. Watercolor paper comes in different weights. The weights can vary from 300 lbs. to 90 lbs. The lighter weight paper is more likely to bucket, and if you rub in one area too much the paper may tear.
Brushes are a very important element in watercolor painting. All brushes come in two shapes: round and flat. Round and flat brushed come in many different sizes. Experiment with all sizes of brushes to discover their potential and limitations. You will have to play with the different brushes to understand how to utilize them in your painting. Eventually, as you develop your techniques, you will settle on a few brushes which are suited to your style of painting.
There are many different watercolor techniques, and it is important you experiment with all of them before starting your project. A wash is a technique when you water down the paint. When a wash is laid on dampened paper, the paint goes on very evenly, because the first application of water enables the pigment to spread out on the paper and dissolve without leaving a hard edge. Working on dry paper gives a mush sharper, crisper effect, and some artists find it a more controllable method. You can also create a graduated wash where the color fades out or gradually fades from one color to another. To fade the value of a color, you will keep adding water to color. To change to another color, you will slowly add the new color to the dominant color. Another technique is wet-on-wet. Wet on wet is one of the most expressive watercolor techniques because your colors will run on the wet surface which will produce a soft, hazy edge to the painted shape. Wet-on-dry is a technique where the colors are applied in series of pure, transparent layers, one over the other; each wash is allowed to dry before the next is added.
Begin by selecting an image to reproduce. You may want to pick an image that is already a watercolor painting because it will be easy to see what brushstrokes and colors you will need to produce to recreate the image. Practice by creating the brushstrokes and colors of your image and decide what techniques are best for each area of your image (washes, wet-on-wet, or wet-on-dry.) Generally speaking, you will create your painting by working from light colors and light values to dark colors and dark values. To create white highlights, you can use the white of the paper for pure whites. For highlights that have color, you can use one of the following techniques. You can create a soft edge by using a damp paper or blend the paint into a white area with a damp brush. You can lift out wet paint by using a soft brush, sponge, or paper towel for soft highlights. You can lift out dry paint by using a damp sponge, brush or paper towel. After you have created your highlights and mid-tones, then start with darker colors and values. When working with dark colors or shadows, your placement of each brushstroke and the color of the paint is most important. When mixing a darker color, remember to mix the color’s complement. Remember to use the elements (color, illusion of form, line/ implied lines, shape/ implied shapes, space, texture, and value) and the principles (balance/composition, contrast, emphasis, movement, pattern, rhythm, and unity) to expressive the ideas or concepts of your painting.
Before turning in your project for grading, you will apply formal critique steps to reflect on your artwork. You make the necessary changes to improve your artwork.
Learning Objectives and Evaluation Standards
Want to learn more about watercolor techniques? Check out the following books:
Cooper, Carol. No Experience Required! Watercolor. Cincinnati, Ohio: North Light Books, 2004.
Johnson, Cathy. Creating Nature in Watercolor an Artist's Guide. Cincinnati, Ohio: North Light Books, 2007.
Light, Duane R. Watercolor. Tustin, CA: Walter Foster Publishing, Inc., 1984.
Norman, David. The Complete Watercolor Set: The Techniques Book. London:Quintet Publishing Limited, 2002.
Reid, Charles. Painting Flowers in Watercolor. Cincinnati, Ohio: North Light Books, 2001.
Due Date: 11/12/2019
Watercolor consists of very finely ground pigments bound with gum solution. The gum enables paint to be heavily diluted with water to make thin, transparent washes of color, without losing adhesion to the support. When mixing paint, always mix more paint than you think you will need. It is very difficult to remix the same exact color a second time. You cannot tell by looking at the paint on a palette whether you have achieved the rich color or value. The color must be seen on the paper. Watercolor always dries lighter on the paper than it appears wet. Have an extra paper to test colors on before applying them to your painting.
The finish of the paper has a lot to do with how the brush and paint will respond. The finish of the paper can either be Hot Press (HP) or Cold Press (CP.) Hot Press has a smoother texture than Cold Press because it goes through hot rollers like an iron. Watercolor paper comes in different weights. The weights can vary from 300 lbs. to 90 lbs. The lighter weight paper is more likely to bucket, and if you rub in one area too much the paper may tear.
Brushes are a very important element in watercolor painting. All brushes come in two shapes: round and flat. Round and flat brushed come in many different sizes. Experiment with all sizes of brushes to discover their potential and limitations. You will have to play with the different brushes to understand how to utilize them in your painting. Eventually, as you develop your techniques, you will settle on a few brushes which are suited to your style of painting.
There are many different watercolor techniques, and it is important you experiment with all of them before starting your project. A wash is a technique when you water down the paint. When a wash is laid on dampened paper, the paint goes on very evenly, because the first application of water enables the pigment to spread out on the paper and dissolve without leaving a hard edge. Working on dry paper gives a mush sharper, crisper effect, and some artists find it a more controllable method. You can also create a graduated wash where the color fades out or gradually fades from one color to another. To fade the value of a color, you will keep adding water to color. To change to another color, you will slowly add the new color to the dominant color. Another technique is wet-on-wet. Wet on wet is one of the most expressive watercolor techniques because your colors will run on the wet surface which will produce a soft, hazy edge to the painted shape. Wet-on-dry is a technique where the colors are applied in series of pure, transparent layers, one over the other; each wash is allowed to dry before the next is added.
Begin by selecting an image to reproduce. You may want to pick an image that is already a watercolor painting because it will be easy to see what brushstrokes and colors you will need to produce to recreate the image. Practice by creating the brushstrokes and colors of your image and decide what techniques are best for each area of your image (washes, wet-on-wet, or wet-on-dry.) Generally speaking, you will create your painting by working from light colors and light values to dark colors and dark values. To create white highlights, you can use the white of the paper for pure whites. For highlights that have color, you can use one of the following techniques. You can create a soft edge by using a damp paper or blend the paint into a white area with a damp brush. You can lift out wet paint by using a soft brush, sponge, or paper towel for soft highlights. You can lift out dry paint by using a damp sponge, brush or paper towel. After you have created your highlights and mid-tones, then start with darker colors and values. When working with dark colors or shadows, your placement of each brushstroke and the color of the paint is most important. When mixing a darker color, remember to mix the color’s complement. Remember to use the elements (color, illusion of form, line/ implied lines, shape/ implied shapes, space, texture, and value) and the principles (balance/composition, contrast, emphasis, movement, pattern, rhythm, and unity) to expressive the ideas or concepts of your painting.
Before turning in your project for grading, you will apply formal critique steps to reflect on your artwork. You make the necessary changes to improve your artwork.
Learning Objectives and Evaluation Standards
- You should be able to employ the use of elements and principles to communicate your ideas.
- You should be able to explore and experiment with the processes, media, and techniques, analyze, and reflect on your choices to effectively communicate your ideas.
- You should be able to apply processes, media, and techniques with sensitivity to craftsmanship.
- You should be able to demonstrate high level of technical skills to communicate your ideas.
- You should be able to analyze common characteristics and/or connections between project and body of work.
- You should be able to complete by due date.
Want to learn more about watercolor techniques? Check out the following books:
Cooper, Carol. No Experience Required! Watercolor. Cincinnati, Ohio: North Light Books, 2004.
Johnson, Cathy. Creating Nature in Watercolor an Artist's Guide. Cincinnati, Ohio: North Light Books, 2007.
Light, Duane R. Watercolor. Tustin, CA: Walter Foster Publishing, Inc., 1984.
Norman, David. The Complete Watercolor Set: The Techniques Book. London:Quintet Publishing Limited, 2002.
Reid, Charles. Painting Flowers in Watercolor. Cincinnati, Ohio: North Light Books, 2001.
Due Date: 11/12/2019
Project: Mixed Media Project (25 pts)
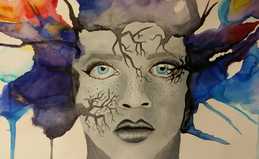
You will create an artwork by combining at least two mediums together in a single artwork. You may use (but not limited to) graphite, charcoal, colored pencils, watercolor paints, acrylic paints, and/ or ink. Your grade for technical skills will be based on the following guidelines:
Graphite, Charcoal, Pen, or Sharpie
Colored Pencils
Pastel
Oil Pastels
Watercolors
Acrylic Paints
Remember to use the elements (color, illusion of form, line/ implied lines, shape/ implied shapes, space, texture, and value) and the principles (balance/composition, contrast, emphasis, movement, pattern, rhythm, and unity) to expressive the ideas or concepts of your artwork.
When you have completed your artwork, you will reflect by creating a written statement.
Before turning in your project for grading, you will apply formal critique steps to reflect on your artwork. You make the necessary changes to improve your artwork.
Learning Objectives and Evaluation Standards
Want to learn more about techniques about using mixed media? Check out the following book:
Dye, Sean. The Mixed Media Source: Techniques for Successfully Combining Painting and Drawing Mediums. New York: Watson-Guptill Publications, 2004.
Due Date: 12/3/2019
Graphite, Charcoal, Pen, or Sharpie
- Create a range of ten values.
- Create simulated or invented texture by using shading, hatching, cross-hatching, or stippling.
Colored Pencils
- Create a range of ten values.
- Create simulated or invented texture by using shading, hatching, cross-hatching, or stippling.
- Layered colored pencils to create values or different colors.
Pastel
- Use of the paper for highlighted areas or areas with shadows depending on the color of the paper.
- Use of the white or light pastels to create light values.
- Use of dark pastels to create dark values.
- Layered pastel colors for halftones.
- Use of black so it did not contaminate the other colors.
- Use of the point and/ or side of the pastel for simulated texture.
- Use of different pastel strokes to create simulated texture.
Oil Pastels
- Use of the white of the paper of highlighted areas.
- Use of layered light oil pastels for highlighted areas.
- Use of layered oil pastels for mid-tones.
- Use of layered dark oil pastels for shadows.
- Use of white or light oil pastels to help blend light areas.
Watercolors
- Use of correct water technique (wash, wet-on-wet, and/ or wet-on-dry) for simulated or invented texture.
- Use of correct brush (round or flat) and size of the brush to create simulated or invented texture.
- Use of correct brush stroke to create simulated or invented texture.
- Use of the white of the paper for white areas.
- Add more water to pigment for lighter areas.
- Lift out wet paint by using a wet brush, sponge, paper towel for highlights.
- Lift out dry paint by using a wet brush, sponge, paper towel for highlights.
- Add more pigment and less water for darker colors or add the color’s complement.
Acrylic Paints
- Create a range of ten values.
- Use of the correct brush (round, flat, or fan) and size of the brush to create simulated or invented texture.
- When appropriate apply paint to create a solid area of color.
- When appropriate blend one color or value smoothly into another color or value.
- Mix paints to create different colors and values.
- Added the color’s complement to create a darker color.
- Covered all areas of the raw canvas with paint.
Remember to use the elements (color, illusion of form, line/ implied lines, shape/ implied shapes, space, texture, and value) and the principles (balance/composition, contrast, emphasis, movement, pattern, rhythm, and unity) to expressive the ideas or concepts of your artwork.
When you have completed your artwork, you will reflect by creating a written statement.
Before turning in your project for grading, you will apply formal critique steps to reflect on your artwork. You make the necessary changes to improve your artwork.
Learning Objectives and Evaluation Standards
- You should be able to employ the use of elements and principles to communicate your ideas.
- You should be able to explore and experiment with the processes, media, and techniques, analyze, and reflect on your choices to effectively communicate your ideas.
- You should be able to apply processes, media, and techniques with sensitivity to craftsmanship.
- You should be able to demonstrate high level of technical skills to communicate your ideas.
- You should be able to analyze common characteristics and/or connections between project and body of work.
- You should be able to complete by due date.
Want to learn more about techniques about using mixed media? Check out the following book:
Dye, Sean. The Mixed Media Source: Techniques for Successfully Combining Painting and Drawing Mediums. New York: Watson-Guptill Publications, 2004.
Due Date: 12/3/2019
Project: Eco-Art (30 pts)

Eco Art, as known as Environmental Art, is a term for a range of artistic practices that encompass both historical approaches to nature in art and more recent ecological and politically motivated artworks. The term Eco Art can be used to refer to art that describes the natural word, art that explores personal engagement with the natural world, and/or artworks that directly address environmental issues in hopes to educate people about the natural world. You will create a conceptual artwork based on the theme “environment.” Your piece can be in any medium. Your grade for technical skills will be based on the following:
Graphite, Charcoal, Pen, or Sharpie
- Create a range of ten values.
- Create simulated or invented texture by using shading, hatching, cross-hatching, or stippling.
Colored Pencils
- Create a range of ten values.
- Create simulated or invented texture by using shading, hatching, cross-hatching, or stippling.
- Layered colored pencils to create values or different colors.
Pastel
- Use of the paper for highlighted areas or areas with shadows depending on the color of the paper.
- Use of the white or light pastels to create light values.
- Use of dark pastels to create dark values.
- Layered pastel colors for halftones.
- Use of black so it did not contaminate the other colors.
- Use of the point and/ or side of the pastel for simulated texture.
- Use of different pastel strokes to create simulated texture.
Oil Pastels
- Use of the white of the paper of highlighted areas.
- Use of layered light oil pastels for highlighted areas.
- Use of layered oil pastels for mid-tones.
- Use of layered dark oil pastels for shadows.
- Use of white or light oil pastels to help blend light areas.
Watercolors
- Use of correct water technique (wash, wet-on-wet, and/ or wet-on-dry) for simulated or invented texture.
- Use of correct brush (round or flat) and size of the brush to create simulated or invented texture.
- Use of correct brush stroke to create simulated or invented texture.
- Use of the white of the paper for white areas.
- Add more water to pigment for lighter areas.
- Lift out wet paint by using a wet brush,sponge, paper towel for highlights.
- Lift out dry paint by using a wet brush, sponge, paper towel for highlights.
- Add more pigment and less water for darker colors or add the color’s complement.
Acrylic Paints
- Create a range of ten values.
- Use of the correct brush (round, flat, or fan) and size of the brush to create simulated or invented texture.
- When appropriate apply paint to create a solid area of color.
- When appropriate blend one color or value smoothly into another color or value.
- Mix paints to create different colors and values.
- Added the color’s complement to create a darker color.
- Covered all areas of the raw canvas with paint.
Sculpture
- See instructor for individualize objectives.
Remember to use the elements (color, illusion of form, line/ implied lines, shape/ implied shapes, space, texture, and value) and the principles (balance/composition, contrast, emphasis, movement, pattern, rhythm, and unity) to expressive the ideas or concepts of your artwork. After you complete your project, you will create a written statement explaining the concept of your piece in a 100 words or less. You should discuss your thoughts, feeling, inspiration, and/or position for creating the artwork. You should discuss what the main idea behind the artwork, and the overall meaning of the work. Discuss the evidence that supports the main idea. The evidence should be within the artwork (what you see that supports your thoughts) and it may also be outside the artwork (in your culture, society, and/or life). Think to yourself, “What associations/conclusions do I hope the viewers make when viewing my work?” It is important to fully explain your thoughts because otherwise the meaning of artwork will vary from viewer to viewer.
Before turning in your project for grading, you will apply formal critique steps to reflect on your artwork. You make the necessary changes to improve your artwork.
Want to learn more about Eco-Art? Look up the following artists: Andy Goldsworthy, Jeff Hong, Marina Debris, and Alan Sonfist.
Learning Objectives and Evaluation Standards
- You should be able to employ the use of elements and principles to communicate your ideas.
- You should be able to explore and experiment with the processes, media, and techniques, analyze, and reflect on your choices to effectively communicate your ideas.
- You should be able to apply processes, media, and techniques with sensitivity to craftsmanship.
- You should be able to demonstrate high level of technical skills to communicate your ideas.
- You should be able to analyze common characteristics and/or connections between project and body of work.
- You should be able to complete by due date.
Due Date: 12/19/2019
First Semester Final: Artist Statement
Second Semester
Project: Research Poster and Mural (30 pts)
Project: Research Poster and Mural (30 pts)
For the wall mural, you will begin by researching an artist, and create a poster that includes facts of the artist, examples of the artist’s work, one formally critic of your favorite artwork, and one activity for the viewers to interact with. You must research a HISTORICAL artist. Find an artist that you can identify with and aligns with your style and/or the concepts found within your portfolio. While you research make sure you are using art history books along with the internet. Utilize a minimum of three references. (Do NOT use Wikipedia as a reference.) At the bottom of the poster you will cite your references using the MLA format. As you research your artist, you will be looking for the following:
Your poster will consist of three panels. One panel will focus on the facts of the artist that you found by researching the artist. One panel will have examples of the artist’s work and you will pick one of images and complete a formal critique (description, analysis, interpretation, and judgement.) The last panel you will create an interactive component to the poster. For example, you could create an eye spy activity or activity suggestion on how to create your own painting or drawing in the style of the artist. Your research will take place over winter break. On your first day of the second semester, you will construct your poster. When your poster is complete, you will pick one piece of artwork from your historical artist that inspired you and draw it out on an 18” by 24” paper. Next, you will trace it on the wall and paint it. Pay close attention to your lines, shapes, and colors when reproducing the piece.
Before turning in your project for grading, you will apply formal critique steps to reflect on your artwork. You make the necessary changes to improve your artwork.
Learning Objectives and Evaluation Standards
Due Date: 2/4/2020
- Date of birth and place of birth.
- Date, age, cause, and place of death.
- List and explain at least two interesting details of the artist’s personal life.
- Art training (schools attend, master or studio in which the artist worked in for training) or is the artist self-taught or a folk artist, then explain what or who influenced the artist’s work and/or the historical context that influenced their work.
- List two people (other artists, teachers, family members, etc.) that influenced the artist’s work and explain how.
- What art movement(s) and/or style(s) of art are the artist part of, and describe the artist’s style.
- Evolution of the artist's style or work.
- Describe special techniques does the artist use when creating artwork.
- Describe the media they appear to use most.
- Describe the subject(s) they seem to use most.
Your poster will consist of three panels. One panel will focus on the facts of the artist that you found by researching the artist. One panel will have examples of the artist’s work and you will pick one of images and complete a formal critique (description, analysis, interpretation, and judgement.) The last panel you will create an interactive component to the poster. For example, you could create an eye spy activity or activity suggestion on how to create your own painting or drawing in the style of the artist. Your research will take place over winter break. On your first day of the second semester, you will construct your poster. When your poster is complete, you will pick one piece of artwork from your historical artist that inspired you and draw it out on an 18” by 24” paper. Next, you will trace it on the wall and paint it. Pay close attention to your lines, shapes, and colors when reproducing the piece.
Before turning in your project for grading, you will apply formal critique steps to reflect on your artwork. You make the necessary changes to improve your artwork.
Learning Objectives and Evaluation Standards
- You should be able to employ the use of elements and principles to communicate your ideas.
- You should be able to explore and experiment with the processes, media, and techniques, analyze, and reflect on your choices to effectively communicate your ideas.
- You should be able to apply processes, media, and techniques with sensitivity to craftsmanship.
- You should be able to demonstrate high level of technical skills to communicate your ideas.
- You should be able to analyze common characteristics and/or connections between project and body of work.
- You should be able to complete by due date.
Due Date: 2/4/2020
Project: Ceramic Sculpture (20 pts)
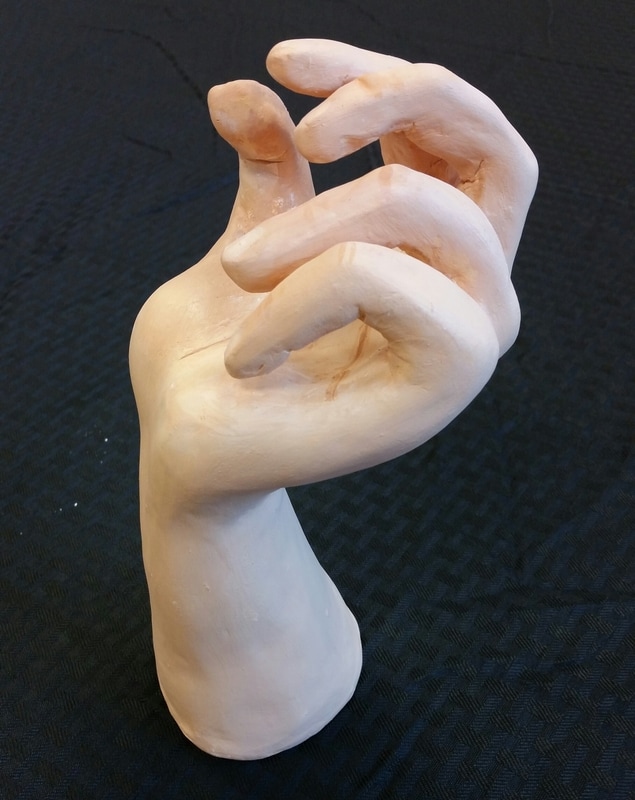
You will research different sculptures that utilizes clay as a medium. We will discuss the different processes the artists used to create the artworks. Next, you will design and build a sculpture. Remember to wedge the clay before beginning your sculpture. (Points will be taken off if your project breaks during the firing process.) Build up your sculpture making sure you follow these guidelines: clay should be no thicker than your thumb and no thinner than your pinky finger, all attached pieces should be slipped and scored, and lastly your initials should be carved into the bottom of your sculpture.
Before turning in your project for grading, you will apply formal critique steps to reflect on your artwork. You make the necessary changes to improve your artwork.
Want to learn more about hand-building techniques in clay? Check out the following book:
Atkin, Jacqui. Handbuilt Pottery Techniques Revealed. Canada: Barron's Educational Series, Inc., 2013.
Learning Objectives and Evaluation Standards
- You should be able to employ the use of elements and principles to communicate your ideas.
- You should be able to explore and experiment with the processes, media, and techniques, analyze, and reflect on your choices to effectively communicate your ideas.
- You should be able to apply processes, media, and techniques with sensitivity to craftsmanship.
- You should be able to demonstrate high level of technical skills to communicate your ideas.
- You should be able to analyze common characteristics and/or connections between project and body of work.
- You should be able to complete by due date.
Due Date: 3/2/2020
Project: Frank Stella Paper Sculpture (20 pts)
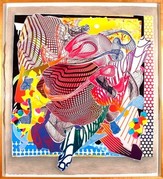
Frank Stella is an American artist that work has evolved from paintings, to wall reliefs, to freestanding sculpture that extends to architecture. As he evolved as an artist, it was not simply that he wanted to move away from flatness to work in three dimensions. He had stop at evolving when he started to produce sculpture. Stella continued because he was preoccupied with the space created by three-dimensional objects. The bridge between his painting and architecture is his relief sculptures. A relief is a piece of sculpture that has a flat background. Relief can hang on a wall or can lay flat on the ground or a table. Stella explored shapes, forms, colors, and lines when designing the reliefs. The reliefs would evolve into larger sculptures and architecture pieces. After studying Stella’s work, you will design a relief. Your relief will be created from tag board and acrylic paint. Just as Frank Stella, you will explore three-dimension negative and positive space. Furthermore, remember to use the elements (color, form, line, shape, space, texture, and value) and the principles (balance/composition, contrast, emphasis, movement, pattern, rhythm, and unity) to expressive the ideas or concepts of your sculpture.
Before turning in your project for grading, you will apply formal critique steps to reflect on your artwork. You make the necessary changes to improve your artwork.
Want to learn more about Frank Stella? Check out the following book:
Goldberger, Paul. Frank Stella: Painting into Architecture. New York, NY: The Metropolitan Museum of Art, 2007.
Learning Objectives and Evaluation Standards
Due Date: 3/19/2020
Before turning in your project for grading, you will apply formal critique steps to reflect on your artwork. You make the necessary changes to improve your artwork.
Want to learn more about Frank Stella? Check out the following book:
Goldberger, Paul. Frank Stella: Painting into Architecture. New York, NY: The Metropolitan Museum of Art, 2007.
Learning Objectives and Evaluation Standards
- You should be able to employ the use of elements and principles to communicate your ideas.
- You should be able to explore and experiment with the processes, media, and techniques, analyze, and reflect on your choices to effectively communicate your ideas.
- You should be able to apply processes, media, and techniques with sensitivity to craftsmanship.
- You should be able to demonstrate high level of technical skills to communicate your ideas.
- You should be able to analyze common characteristics and/or connections between project and body of work.
- You should be able to complete by due date.
Due Date: 3/19/2020
Project: Blue Jay Spirit Contest (30 pts)

The Blue Jay Spirit project represents and answers the question, what does it mean to have school spirit at Jefferson R-VII. It is open to interpretation and will vary from artist to artist. The style of the project depends on the artist’s interpretation and can vary from realistic to abstract. Remember to use the elements (color, illusion of form, line/ implied lines, shape/ implied shapes, space, texture, and value) and the principles (balance/composition, contrast, emphasis, movement, pattern, rhythm, and unity) to expressive the ideas or concepts of your artwork. The project provides Art III and Art IV students the possibility to have his or her artwork as a part of a permanent collection at Jefferson. The artwork will be purchased, framed, and displayed on campus. All artworks must be two-dimensional, but any media can be utilized as long as it can be framed. After the work is finished, it will be submitted along with an artist statement explaining the position or concept of the artwork. If your work is selected, remember to update your resume. Your grade for technical skills will be based on the following guidelines:
Graphite, Charcoal, Pen, or Sharpie
Colored Pencils
Pastel
Oil Pastels
Watercolors
Acrylic Paints
When you have completed your artwork, you will reflect by creating a written statement. You will write one paragraph explaining the concept of your artwork (Blue Jay Spirit.) Remember you should have a topic sentence, chunks of information supporting your topic sentence, and a concluding sentence. Please print it out and turn in with your project for judging.
Before turning in your project for grading, you will apply formal critique steps to reflect on your artwork. You make the necessary changes to improve your artwork.
Learning Objectives and Evaluation Standards
Due Date: 4/20/2020
Graphite, Charcoal, Pen, or Sharpie
- Create a range of ten values.
- Create simulated or invented texture by using shading, hatching, cross-hatching, or stippling.
Colored Pencils
- Create a range of ten values.
- Create simulated or invented texture by using shading, hatching, cross-hatching, or stippling.
- Layered colored pencils to create values or different colors.
Pastel
- Use of the paper for highlighted areas or areas with shadows depending on the color of the paper.
- Use of the white or light pastels to create light values.
- Use of dark pastels to create dark values.
- Layered pastel colors for halftones.
- Use of black so it did not contaminate the other colors.
- Use of the point and/ or side of the pastel for simulated texture.
- Use of different pastel strokes to create simulated texture.
Oil Pastels
- Use of the white of the paper of highlighted areas.
- Use of layered light oil pastels for highlighted areas.
- Use of layered oil pastels for mid-tones.
- Use of layered dark oil pastels for shadows.
- Use of white or light oil pastels to help blend light areas.
Watercolors
- Use of correct water technique (wash, wet-on-wet, and/ or wet-on-dry) for simulated or invented texture.
- Use of correct brush (round or flat) and size of the brush to create simulated or invented texture.
- Use of correct brush stroke to create simulated or invented texture.
- Use of the white of the paper for white areas.
- Add more water to pigment for lighter areas.
- Lift out wet paint by using a wet brush, sponge, paper towel for highlights.
- Lift out dry paint by using a wet brush, sponge, paper towel for highlights.
- Add more pigment and less water for darker colors or add the color’s complement.
Acrylic Paints
- Create a range of ten values.
- Use of the correct brush (round, flat, or fan) and size of the brush to create simulated or invented texture.
- When appropriate apply paint to create a solid area of color.
- When appropriate blend one color or value smoothly into another color or value.
- Mix paints to create different colors and values.
- Added the color’s complement to create a darker color.
- Covered all areas of the raw canvas with paint.
When you have completed your artwork, you will reflect by creating a written statement. You will write one paragraph explaining the concept of your artwork (Blue Jay Spirit.) Remember you should have a topic sentence, chunks of information supporting your topic sentence, and a concluding sentence. Please print it out and turn in with your project for judging.
Before turning in your project for grading, you will apply formal critique steps to reflect on your artwork. You make the necessary changes to improve your artwork.
Learning Objectives and Evaluation Standards
- You should be able to employ the use of elements and principles to communicate your ideas.
- You should be able to explore and experiment with the processes, media, and techniques, analyze, and reflect on your choices to effectively communicate your ideas.
- You should be able to apply processes, media, and techniques with sensitivity to craftsmanship.
- You should be able to demonstrate high level of technical skills to communicate your ideas.
- You should be able to analyze common characteristics and/or connections between project and body of work.
- You should be able to complete by due date.
Due Date: 4/20/2020
Project: The Value of a Teacher (15 pts)
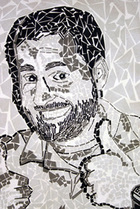
Congratulations! You are on your last project! I want you to take a minute and reflect back to your time at Jefferson R-VII. Pick one faculty or staff member that you feel had most influenced on your life. After you have chosen the faculty or staff member, you will photograph him or her for your next project. When you are photographing think about the composition. Step back and evaluate your subject as a flat pattern of interlocking shapes and values that add up to a balanced design. Make sure you are analyzing for value and not color because the picture will be turned to black and white. In addition, think about their facial expressions, and what meaning will that bring to the artwork and how it will contribute to the composition. Take several photographs to ensure you get the best photograph of your subject. Print the photograph out in black and white. The minimum size should be no smaller than an 8” by 10”. You begin by sketching out the portrait image on a 12” by 18” piece of paper. When you are finished, I will provide you will value strips of paper. Start with the darkest values first and cut the black value paper in small shapes to fill in the darkest areas of the sketch. Next, complete the mid-tones and then move on to the highlighted areas by filling them in white paper. When your image is completed, you will paint on a layer of glue. Lastly, write a thank you letter to that person, and explain to them why you picked them for the project.
Before turning in your project for grading, you will apply formal critique steps to reflect on your artwork. You make the necessary changes to improve your artwork.
Learning Objectives and Evaluation Standards
Due Date: 5/6/2020
Before turning in your project for grading, you will apply formal critique steps to reflect on your artwork. You make the necessary changes to improve your artwork.
Learning Objectives and Evaluation Standards
- You should be able to employ the use of elements and principles to communicate your ideas.
- You should be able to explore and experiment with the processes, media, and techniques, analyze, and reflect on your choices to effectively communicate your ideas.
- You should be able to apply processes, media, and techniques with sensitivity to craftsmanship.
- You should be able to demonstrate high level of technical skills to communicate your ideas.
- You should be able to analyze common characteristics and/or connections between project and body of work.
- You should be able to complete by due date.
Due Date: 5/6/2020
Second Semester Final: Update resume and complete portfolio requirements
